Steps to activate CCAvenue payment gateway on Linker.store

Ecommerce


217 week ago — 4 min read
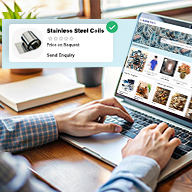
Today, a large number of online shoppers prefer to pay online rather than with Cash on Delivery. If you have an online store, it is important that you accept online payments to ensure maximum sales.
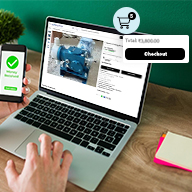
A payment gateway acts as the mediator between your online store and the payment processor and provides your customers with a secure and seamless transaction platform. An efficient payment gateway increases customer loyalty and sales. GlobalLinker’s eCommerce platform – Linker.store - provides you with four integrated payment gateway options: Razorpay, CCAvenue, Paytm, Paypal.
In this guide, we will walk you through how to activate the CCAvenue payment gateway.
Before you get to activating CCAvenue for your online store, ensure you have completed your store setup. Here are 6 things you need to do before applying for Payment Gateway.
1. Upload at least 5 products
2. Review and activate Policy Pages
3. Add About Us page
4. Add valid contact details
5. Add correct business name as per government proof of records
6. Ensure site looks presentatable
Once your store setup is complete, follow the below steps.
To activate CCAvenue follow these steps
STEP 1
Login to your GlobalLinker account.
STEP 2
Click on the Online Store in the top menu.

STEP 3
Click on Store Settings > Payments. This will open the payment management screen.

STEP 4
Under Payments, select CCAvenue and the CCAvenue Payment Gateway page will open up. Here you can review the payment method-wise charges. Once you have reviewed these, click on Apply for CCAvenue Payment Gateway

STEP 5
Next you will arrive on the below page where you have to fill and submit the below forma with details like the legal entity of your business, your legal business name, estore url, business address as per government proof of records, business email, phone, mobile number, PAN card, business category, describe your products or service, specify product delivery mode, estimate of monthly transactions and value along with minimum and maximum product value. Once you have filled this form, click on Submit.

The application will go to the CCAvenue team and you will have to provide the required KYC documents. After that your account will get activated in 3 - 5 working days. Once the account is activated, you will have to generate API Keys from your account and add them to your online store to start using CCAvenue Payment Gateway to receive payments from your customers digitally.
For further assistance, write to us at ‘info@linker.store’ or call at +91-22-48931736.
Also read: 10 advantages of activating online payments on your eStore
To explore business opportunities, link with me by clicking on the 'Connect' button on my eBiz Card.
Image source: shutterstock.com
Disclaimer: The views and opinions expressed in this article are those of the author and do not necessarily reflect the views, official policy or position of GlobalLinker
Posted by
GlobalLinker StaffWe are a team of experienced industry professionals committed to sharing our knowledge and skills with small & medium enterprises.
Network with SMEs mentioned in this article

View GlobalLinker 's profile
Most read this week

Trending
Learning & Development 43 week ago
Comments (1)
Share this content
Please login or Register to join the discussion